How to cleanup the initial WordPress install

Once you setup your WordPress installation, you need to clean up the default post, pages, and comments. Now as you may recall I often do this after my first page creation because I’m too excited to clean things up before getting some content on the site, so I give you permission to do that if you want/need to.

Delete the “Hello World” post that is automatically created.


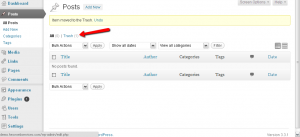
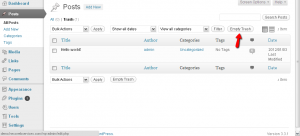
  1. On the admin page, go to “Posts” -> “All Posts” and click “Trash”Trash A WordPress Post
  2. Open the Trash
  3. Empty the TrashEmpty the Trash
Delete the “Sample Page” page that is automatically created.
  1. On the admin page, go to “Pages” -> “All Pages” and click “Trash”
  2. Empty the trash just as we did the Posts above.
Setup your default Post category – If you are going to be using Posts (for blog, news, or updates of some sort) you want to set the default category (It is “uncategorized” by default)
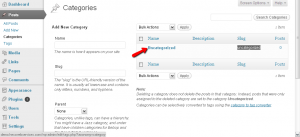
  1. On the admin page go to “Posts” -> “Categories”Click on the Category Name to Edit
  2. Click on the Name (Uncategorized)
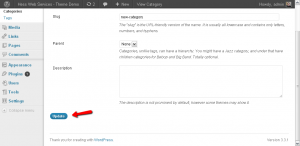
  3. Change the Name and the “slug” (The “slug” is the URL-friendly version of the name. It is usually all lowercase and contains only letters, numbers, and hyphens – Use hyphens for spaces.) Update the Category Name
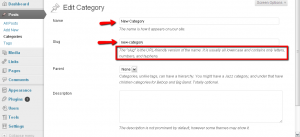
  4. Submit by pushing the update button 


Delete Default Plugins – I usually like to get rid of all the plugins and start fresh – choosing myself what I want.

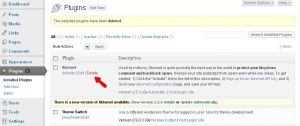
  1. From the admin page go to “Plugins”
  2. Delete the Plugins (There is no trash this time)Delete WordPress Plugins


Delete Default Links

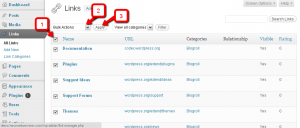
  1. From the admin page go to “Links”
  2. Delete each Link – If you want you can “bulk” delete the links by checking the checkbox, selecting delete in the drop down, and clicking applyBulk Delete Links


Now you should have a nice clean setup.  We have a few more maintenance steps to take care of to get things together but we’ll leave those for our next post.


Posted

in

by

Comments

5 responses to “How to cleanup the initial WordPress install”

  1. Sam Avatar

    Hello dude, i appreciate your tutorials..
    I hope you can help me in my case :
    I do wanna start an eCommerce business website, and i found that wp is the best way to do so..I’m not a web designer i’m just an expert blogger but i feel its time for me to go to the next level and be a webmaster..So i did many researches and here is what i found :
    To make a website i’ll need :
    1-A hosting
    2-A Domain registration
    3-And wp contents
    But i was wondering how to use a desired theme, so i searched for one and i found a nice/free one http://goo.gl/ZWaEc … i download it but i still don’t know how to upload it to a server..

    So my questions will be :

    1-What’s the different between wordpress.org & wordpress.com?
    2-how to upload my theme to my host after uploading wp contents?

    I’ll be very grateful if you help me on that.

    Thank you.

    1. Chris Avatar

      WordPress themselves list a bunch of pros and cons for both the .com and .org versions here: http://en.support.wordpress.com/com-vs-org/
      It basically boils down to the fact that hosting on WordPress.com is free but is restricted in both plugins and themes. If you buy your own hosting you have to do more work to set it up but you have complete control over what you can put on the site as far as themes and plugins.

      If you want to upload your new theme, there is an article here where I have given the steps. If you have trouble with anything, let me know.

      1. Sam Avatar

        Thank you so much, but i still don’t know what theme files should i upload, should i upload the whole folder of the theme or upload it unzipped..

        I have this difficulty cause i used to deal with blogger.com which is more eazy.

        Thanks again.

        1. Chris Avatar

          After looking at the theme you should just be able to upload the zip file. There is a link “Download the WordPress theme” that downloads a zip file. Log in to your WordPress installation and navigate to Appearance -> Themes on the left menu. Once the page opens, on the top there is a tab for “Install themes”. Click that and then there is an option to “Upload”. Upload the zip file there and you should be all set. Once you activate it, it will create a “Velvet Menu”. It looks as though this is a theme, but not actually an eCommerce platform for WordPress. I think what you want is to install PrestaShop from here: http://www.prestashop.com/en/download and then setup the WordPress theme so you have a blog and a separate ‘store’. If you are looking for eCommerce plugins for WordPress I’d recommend Jigoshop but there are others (and more).

  2. Blog mode Avatar

    Ravie d’avoir découvert ton blog , il est très cool!

Leave a Reply

Your email address will not be published. Required fields are marked *