1. From the dashboard, select “Posts” or “Pages.” To do this, log in to your WordPress website with your username and password. Once you are in the dashboard area, look for the “Posts” or “Pages” option in the left-hand sidebar. Click on it to proceed.
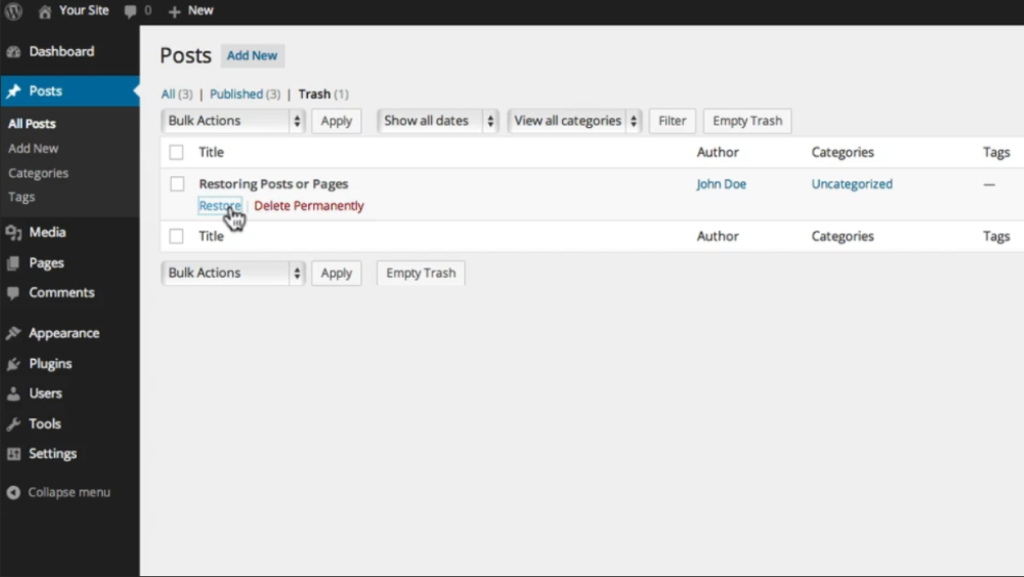
2. Click on the “Trash” link. After selecting either “Posts” or “Pages,” you will see a list of all your existing posts or pages. At the top of the list, you will find a tab or link labeled “Trash.” Click on it to proceed to the trash section.
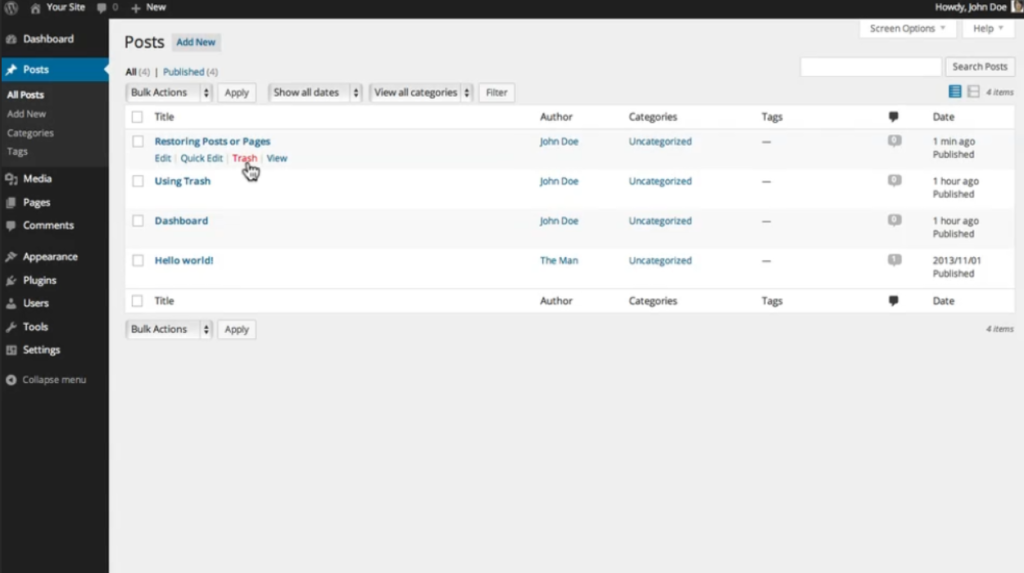
3. Here, you will find a list of all the items you have placed in the trash within the last thirty days. In the trash section, you will see a complete list of all the posts or pages that you have deleted or removed within the past thirty days. This list is where you can find the items you want to restore, view, or permanently delete.
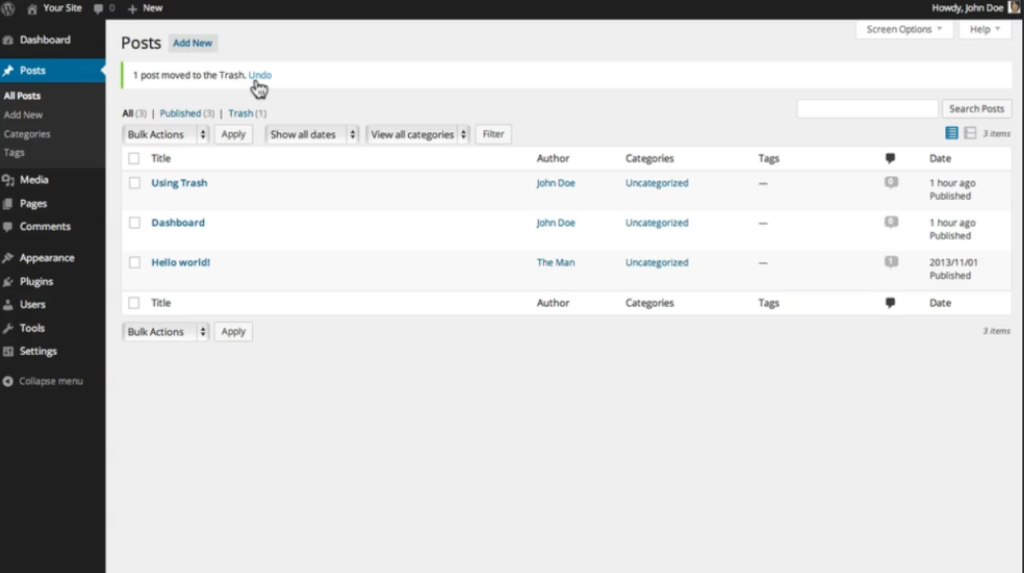
4. Items left in the trash will be permanently deleted in thirty days. It is important to note that any item you have placed in the trash will be automatically deleted after thirty days. If you do not restore or permanently delete the item within this time frame, it will be gone forever.
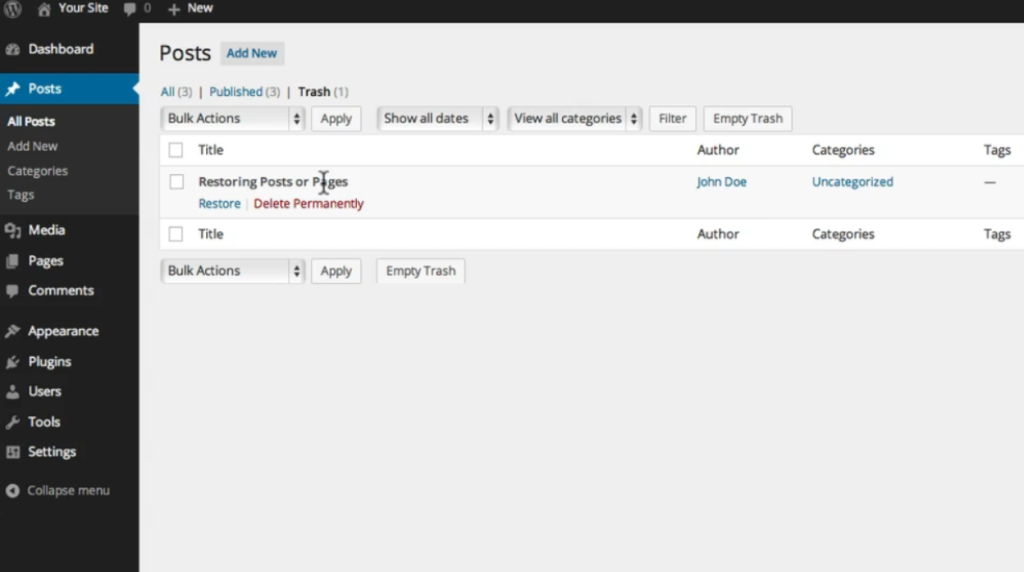
5. Hover your mouse over an item placed in the trash to reveal options. To interact with the items in the trash, simply hover your mouse over the specific post or page you want to deal with. This will bring up a list of options you can choose from.
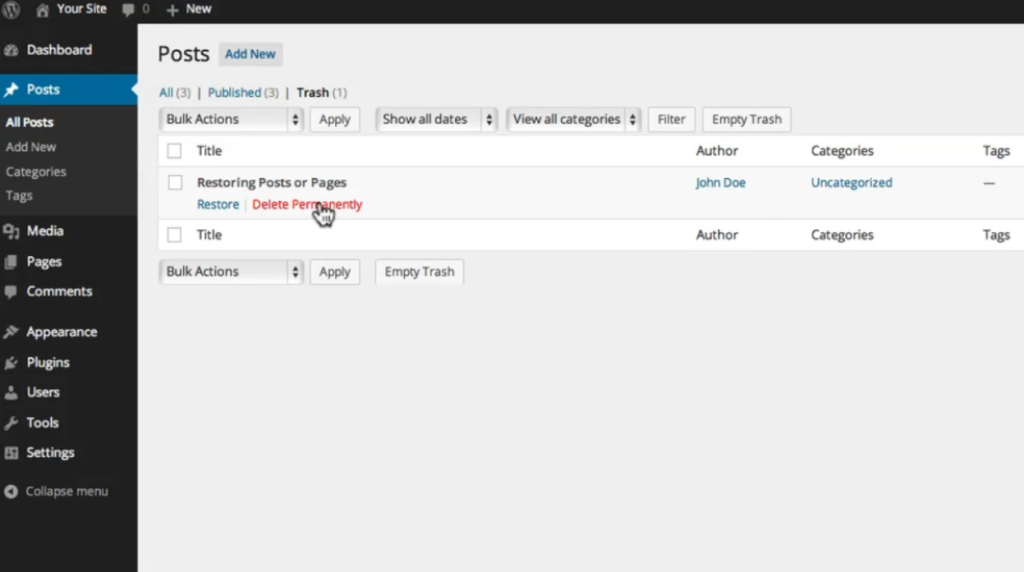
6. You can either choose to delete the item permanently, never to be seen again, or restore it back to the posts or pages section of your dashboard for immediate use. From the options that appear when you hover over an item in the trash, you can choose to permanently delete the item by clicking on the “Delete Permanently” option. If you want to restore the item, click on the “Restore” option, and it will be moved back to the “Posts” or “Pages” section of your dashboard.
By following these steps, you can easily manage the items in your trash, whether you want to restore them or permanently delete them from your WordPress website.

Leave a Reply